
Plant & Plant Stand Tutorial
Create a plant and a three-legged plant stand for your 1:12 or 1:6 scale miniature scene.
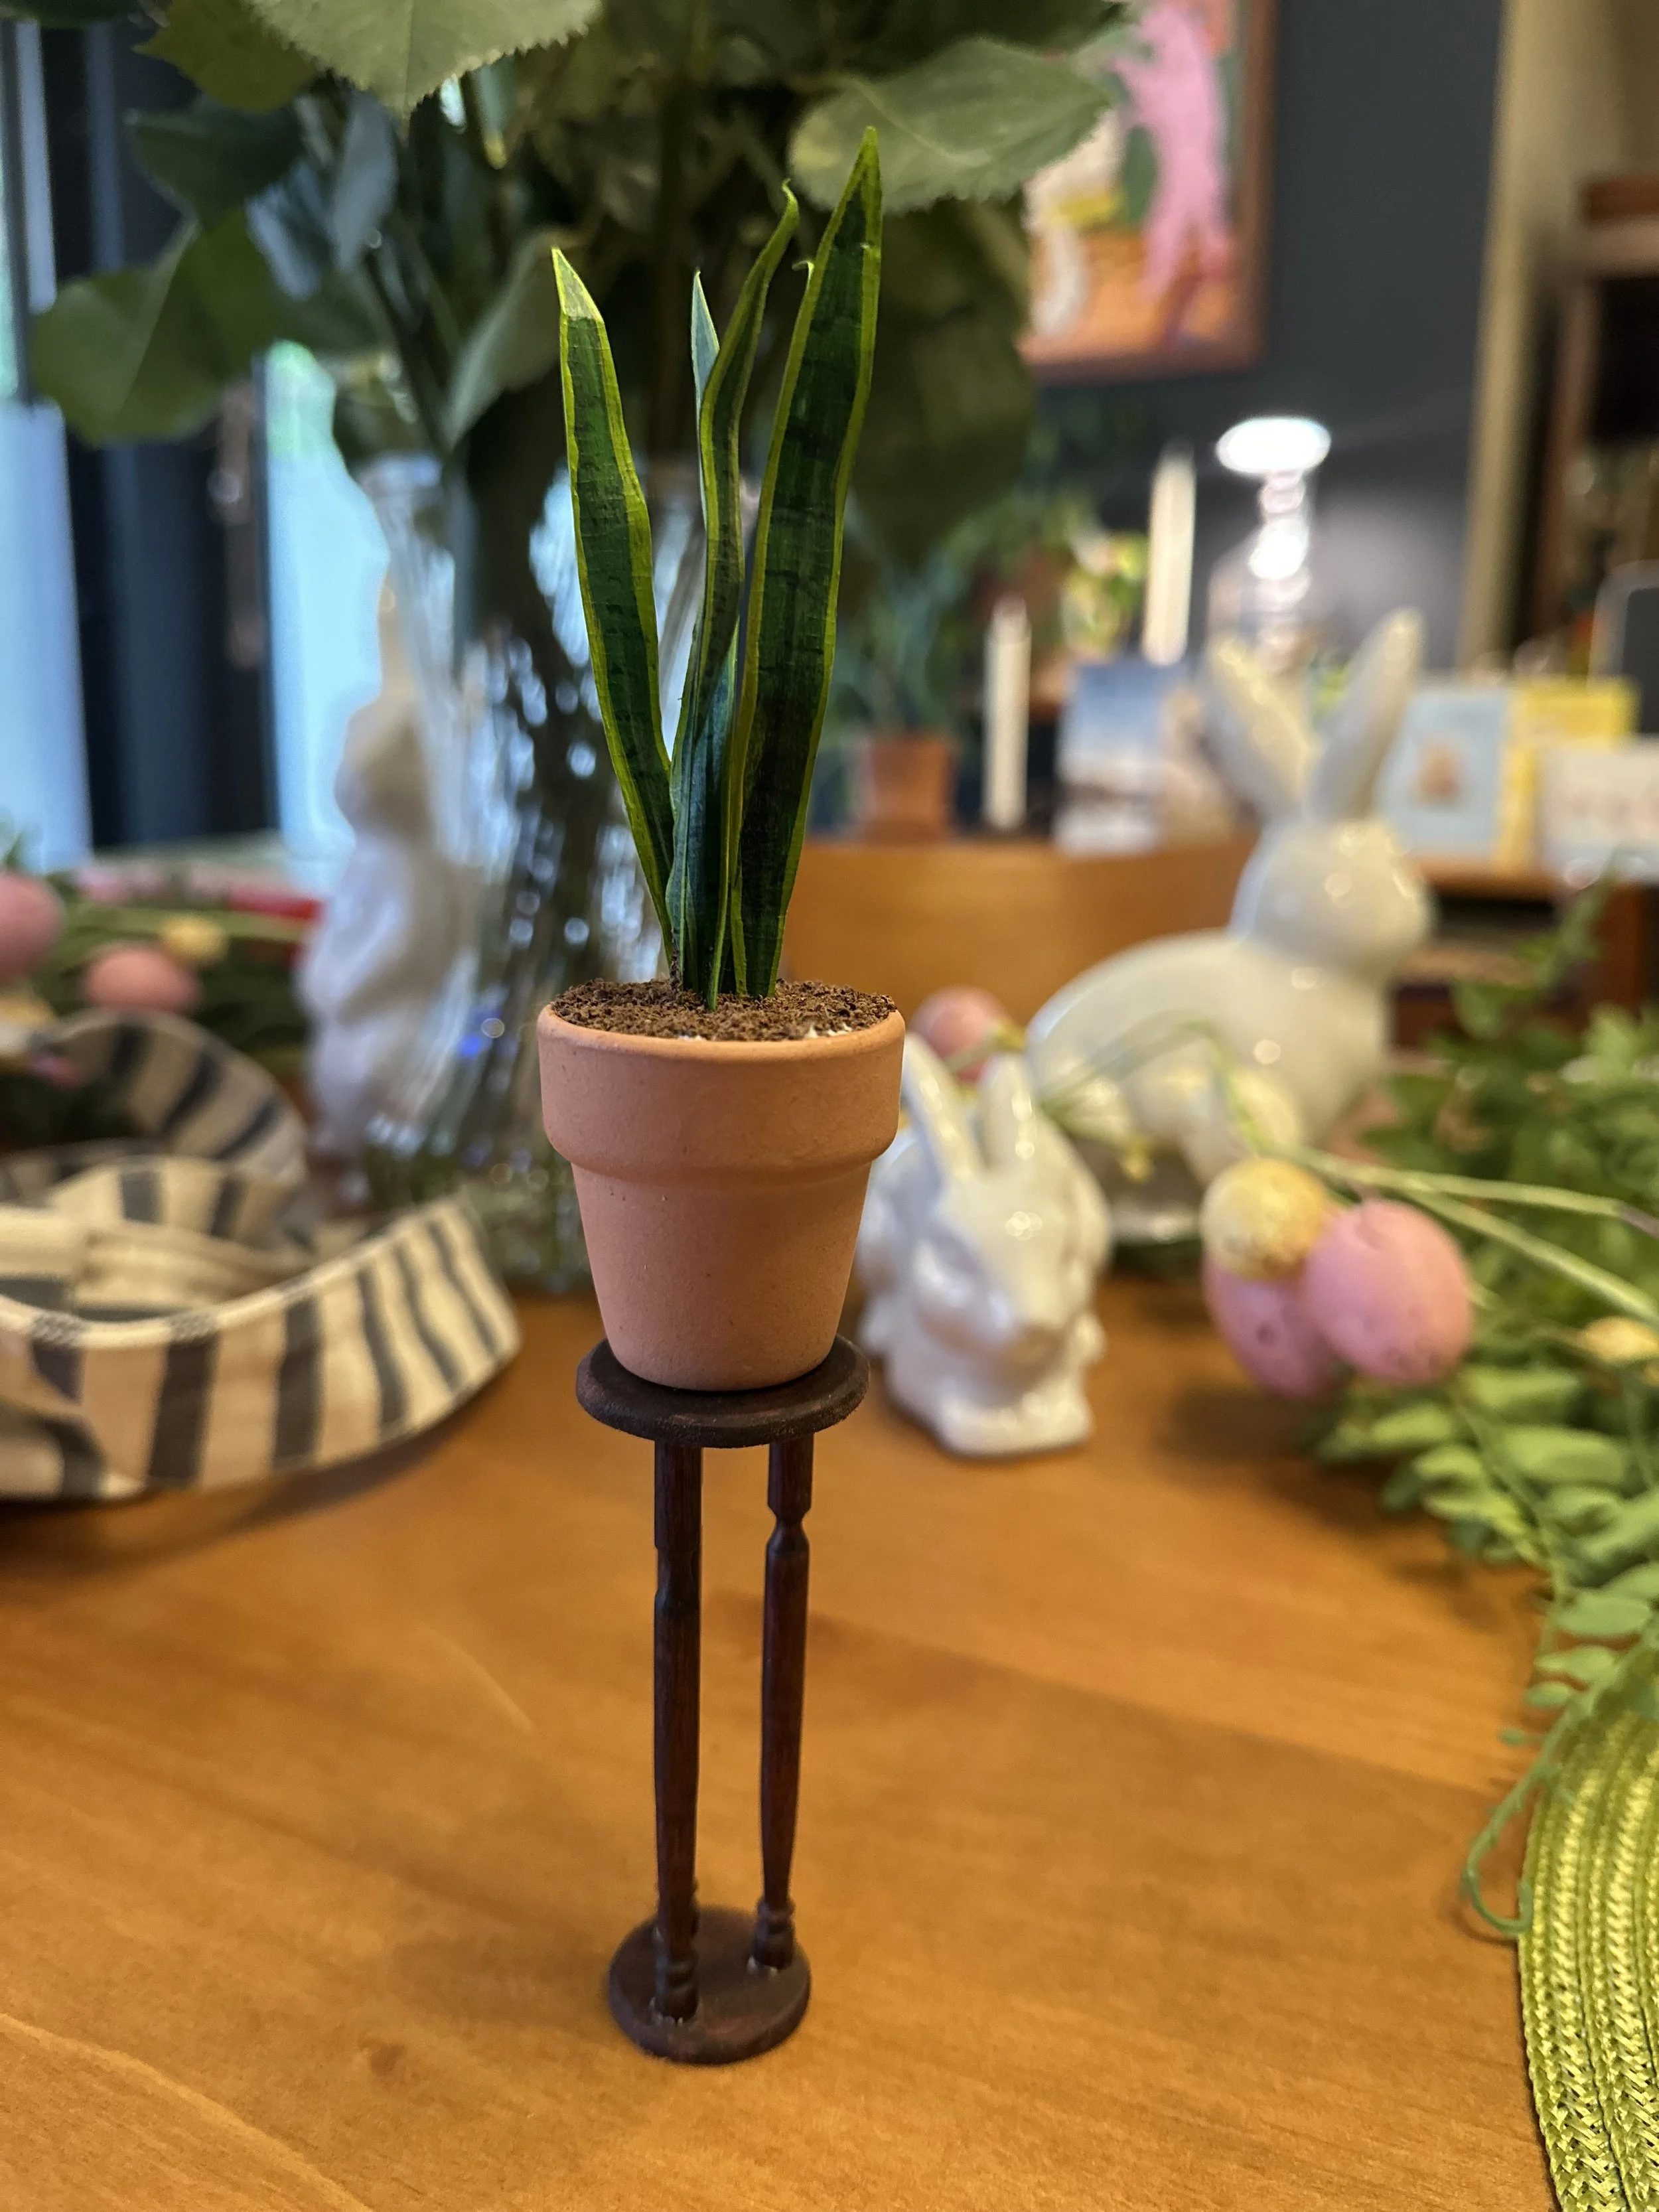

Plant Stand
Supplies needed:
3/16” diameter dowels
1/8” thick basswood sheet (preferably not plywood)
Wood glue
Wood stain markers (or paint)
wood polish (optional)
Ruler
Jeweler’s saw and bench pin clamp
Miter box & saw (optional)
Mini lathe (optional)
Sand paper (180 and 320)
1” and 1 1/4” circle templates & washable or low adhesive glue stick. (Example of circle template .pdf download from Tim’s Printables)
Instructions:
If using lathe (skip to number 2 if not using lathe)
Cut dowels into (3) 6” lengths. Decide on design and mark on dowels for lathing so they all match.
Sand each lathed dowel and stain using marker (or paint) on the lathe before beginning the next dowel
Cut each dowel to 3”, carefully matching designs together. This is done most easily using a miter box & saw.
If not using lathe:
Cut dowels into (3) 3” lengths. This is done most easily using a miter box and saw
Stain or paint dowels
Cut out circle templates and glue to 1/8” basswood sheet using glue stick
Cut circles out using jewelers saw.
Sand circles/discs with 180 then 320 sand paper
Stain or paint discs to match dowels
Position dowels equidistant from each other in a triangle on the smaller disc. This disc will be the BASE of the stand. It may be helpful to put a mark in pencil where the dowel will be glued. Put a small dab of wood glue on dowels, place on disc, and hold in place until tacky enough to stand on own.
Put a dab of wood glue on the other end of each dowel and position the larger disc so dowels are straight up and down and in the middle of the larger disc. This disc will be the TOP of the stand.
It may be helpful to add a small weight to the plant stand as it dries for the best glue adhesion.
When fully dry, touch up paint if necessary or, if stained, polish wood to bring out natural beauty of wood grain.
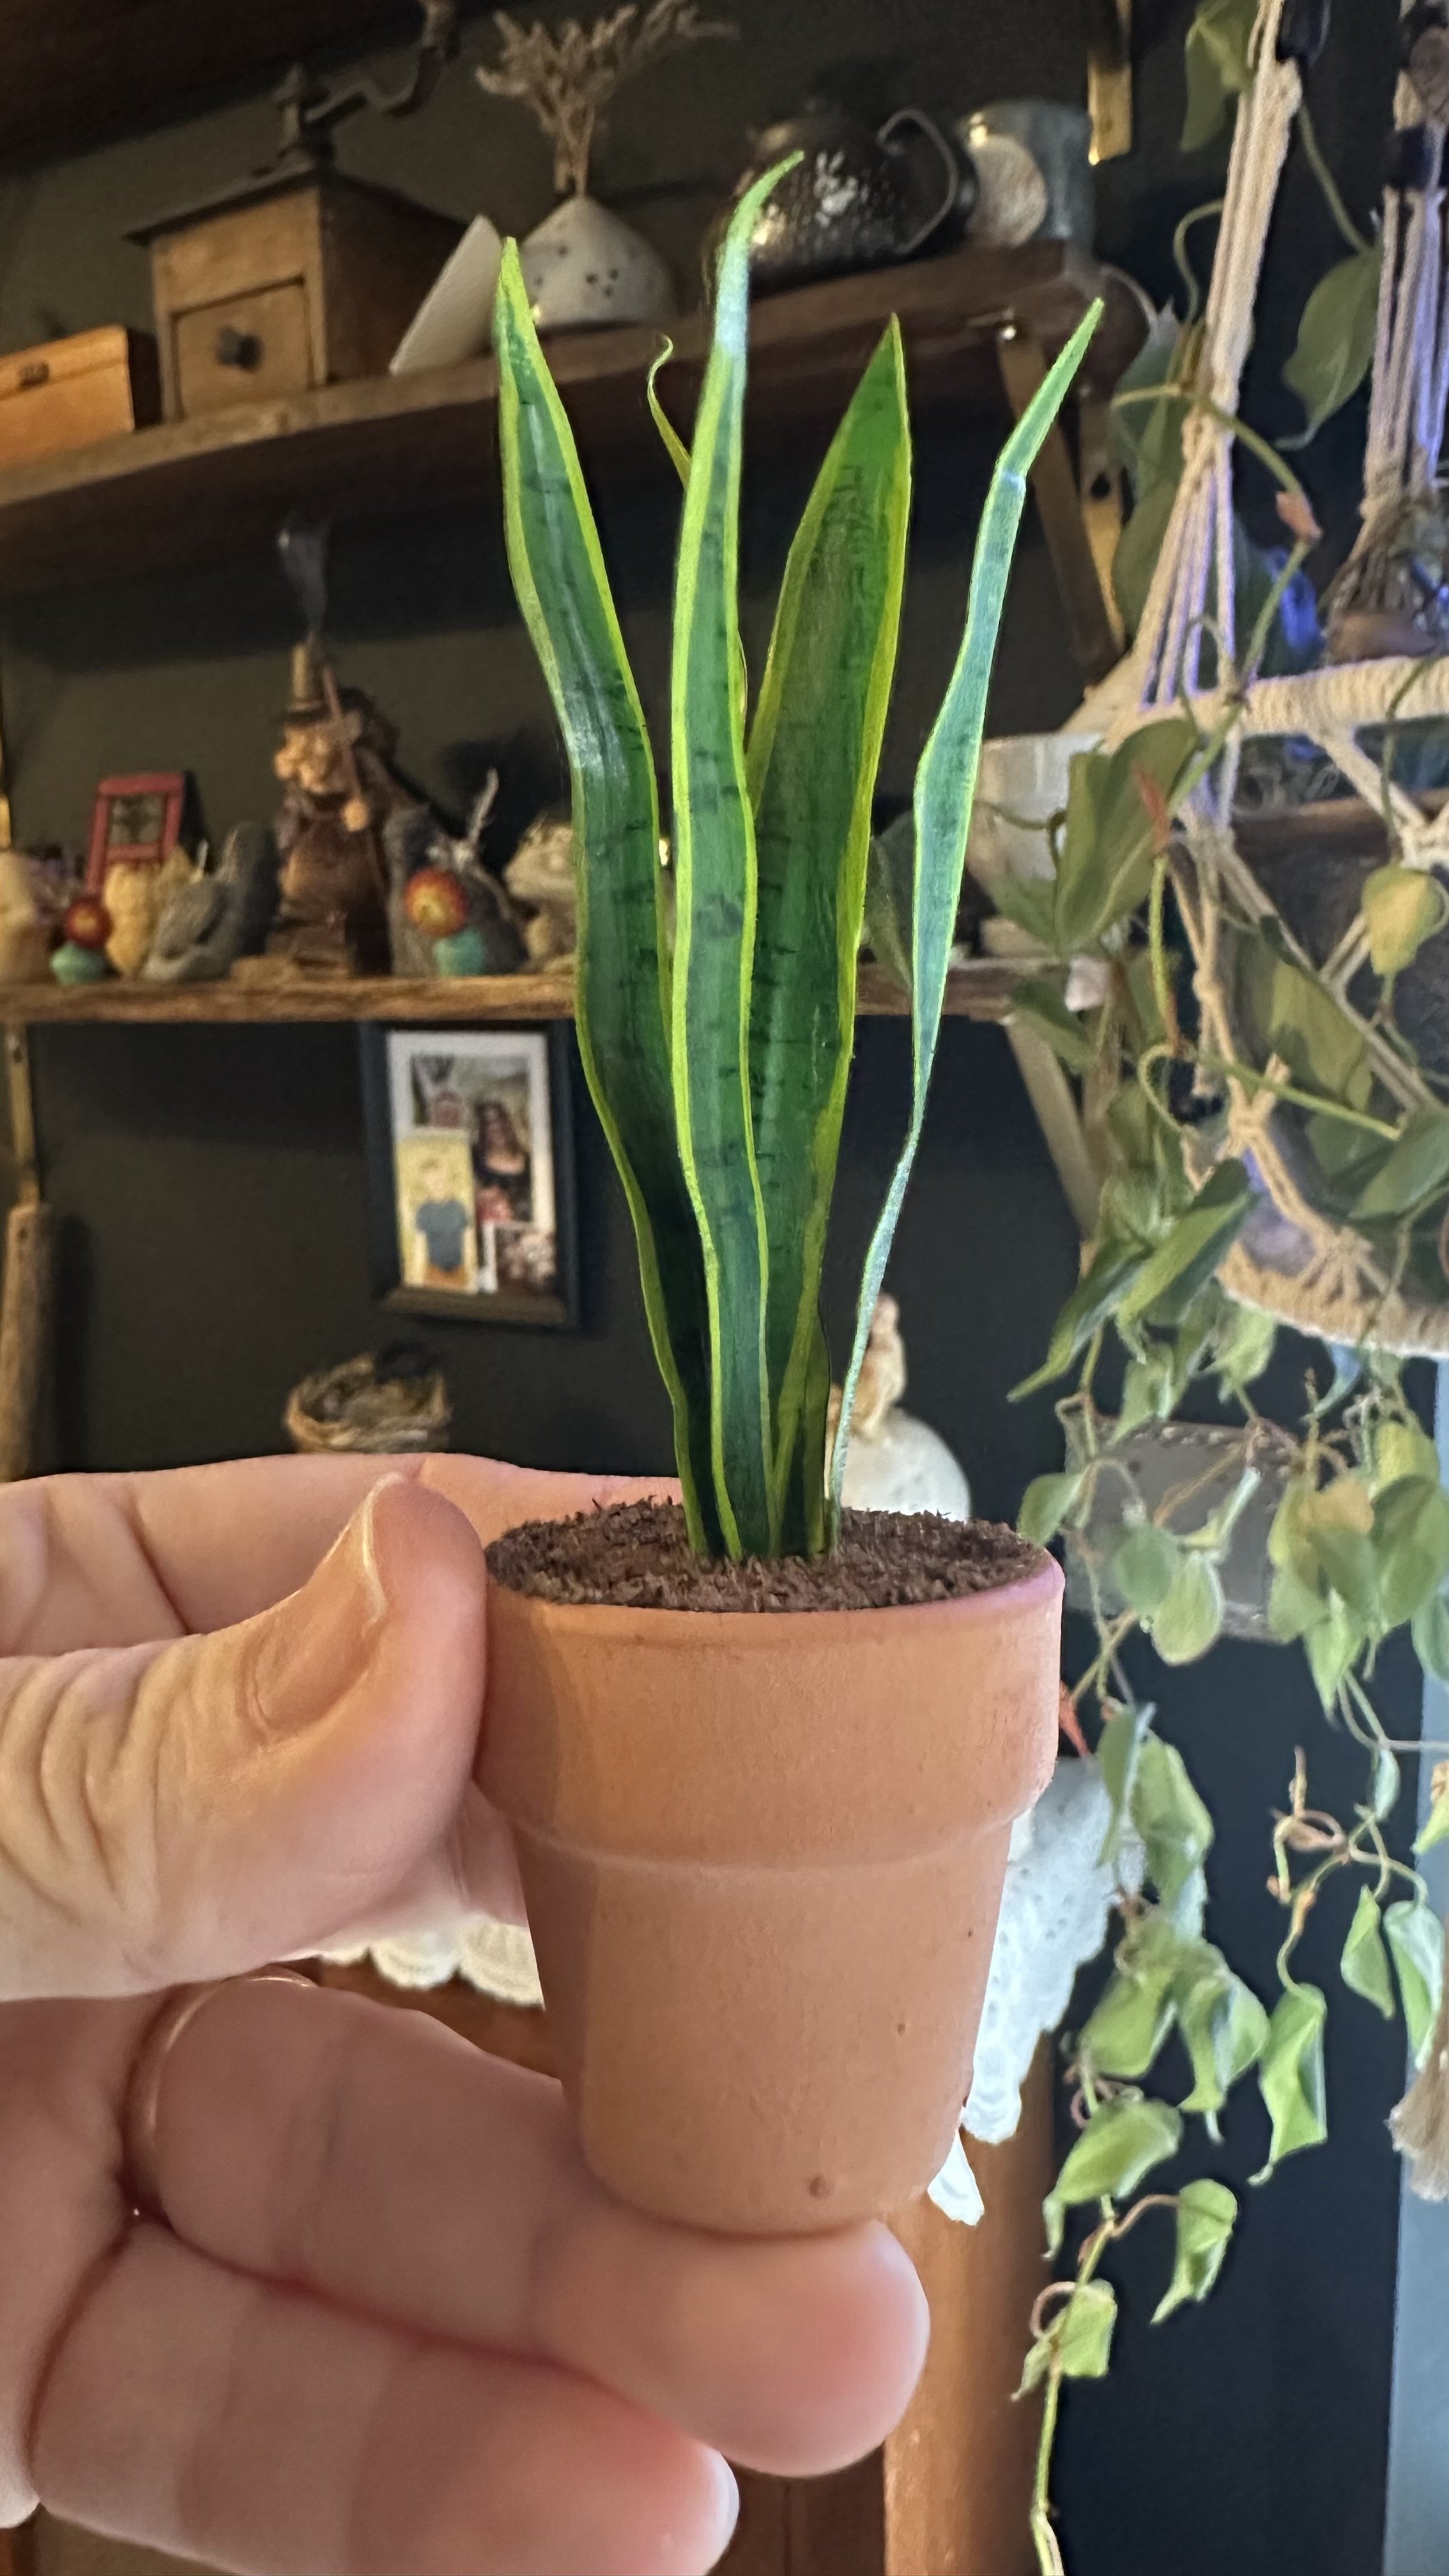
Plant
Supplies needed:
Painters Tape
Thin gauge floral wire
Paint
Gloss or matte medium or Mod Podge (optional and depending on type of plant)
Scissors (an Xacto blade may be helpful depending on intricacy of plant leaves)
A scrap piece of styrofoam to stick wires into while drying painted “leaves”
Air-dry clay (I use Sculpey porcelain because it dries quickly and has some weight to it)
PVA glue
Black tea, brewed and fully dried
Small terracotta pot (or similar)
Round-nose pliers for shaping leaves/wire (optional)
Instructions:
Decide on the type of plant you’d like to replicate. Find some inspiration pictures to model your leaves after. In my example I chose a snake plant, which is a very easy shape and relatively easy to paint.
Fold painters tape over wire and cut out leaves in desired shape. Depending on the leaf shape, be mindful of where the wire is so that it potentially can serve as a central “rib”. Leave a length of exposed wire a little shorter than the depth of your pot to eventually insert into the clay.
Paint leaves. Having several shades of your target color will give a more realistic effect to get variations. Stick into styrofoam to dry. If needed, finish with a layer of gloss or matte medium/varnish depending on the type of plant you choose.
When leaves are ready to be handled, shape them as necessary using your fingers or round-nose pliers. This can also be done prior to painting, but I find it easier to paint the leaves when they are flat and shape once dry.
Squish some air-dry clay into the pot, leaving at least a few millimeters (5+mm) of space from the top.
Stick leaves into the clay, arranging in a realistic way. Leave a small amount of wire exposed above the surface. This will be covered in glue and “soil” in the next steps.
Pour a thin layer of PVA glue (or similar glue of choice) over the air dry clay, and let it self level around the wires.
Spoon enough tea/“dirt” over the wet glue to completely cover it. Press lightly and gently shake off excess.
Once dry, place on your plant stand. Voilà!